• Skip to primary navigation
  • Skip to content
  • Skip to primary sidebar
  • Skip to footer

Simply Made Fun

love what you create

  • about
  • crafts
  • disney
  • Nav Social Menu

    Follow Along

    • Facebook
    • Instagram
    • Pinterest
    • Twitter

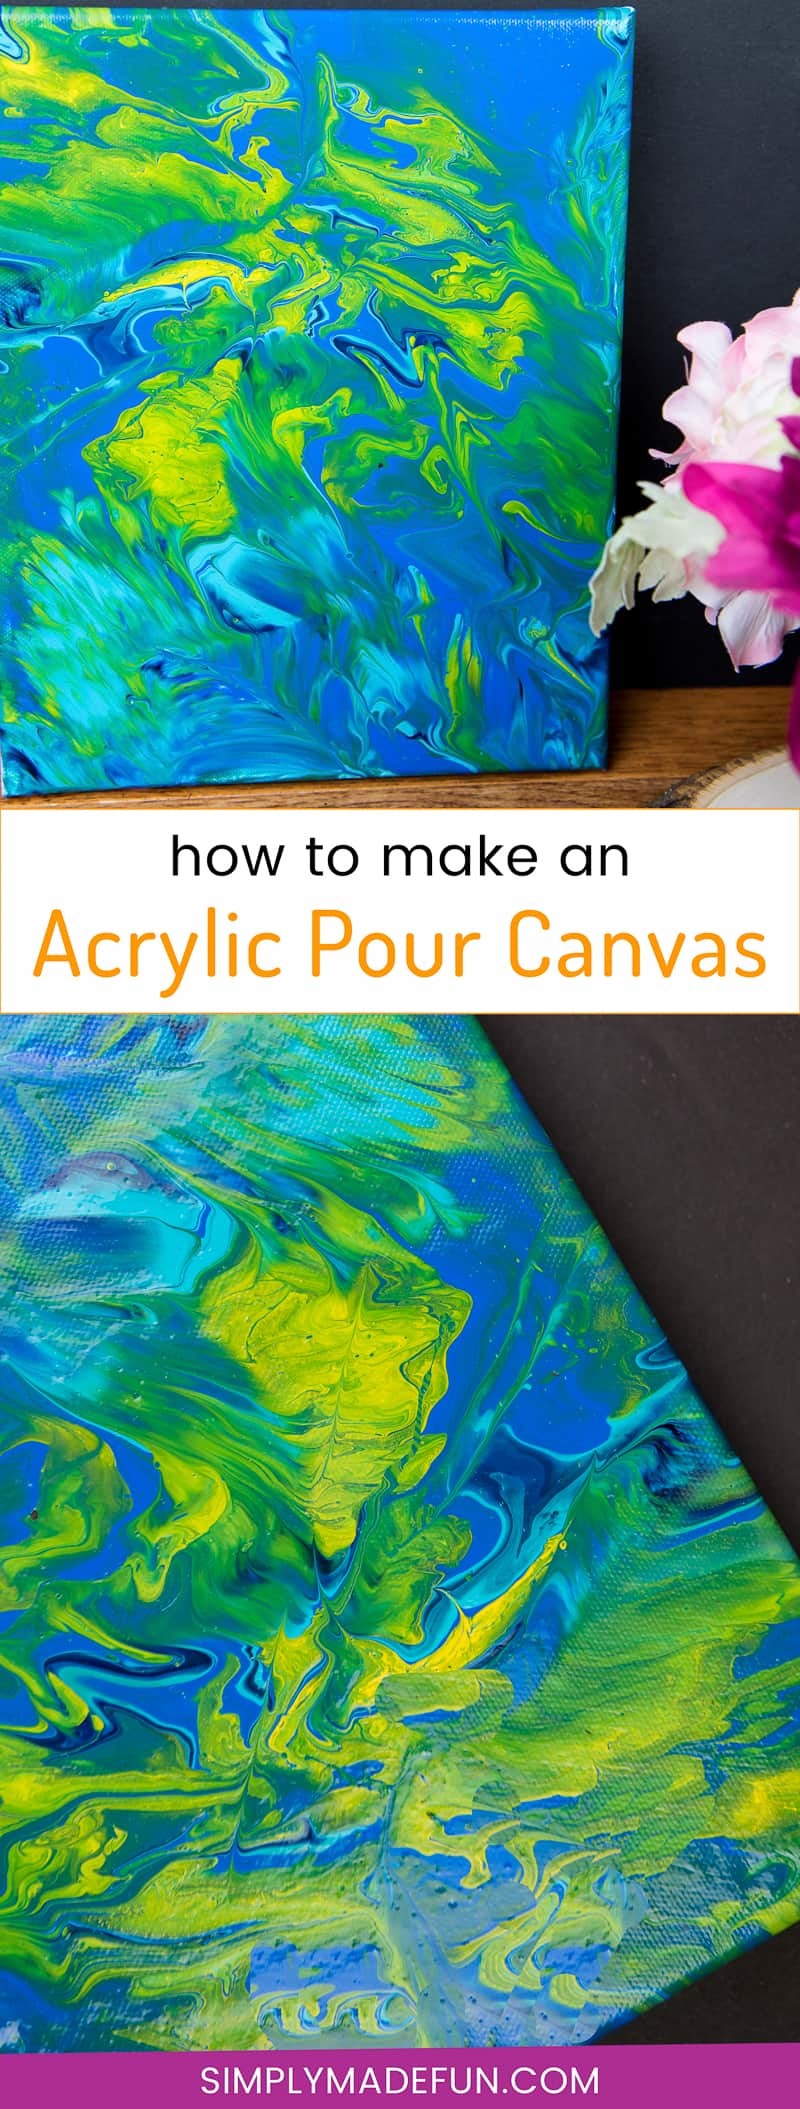
How to Make an Acrylic Pour Canvas


This post contains affiliate links. Please see my Disclosure Policy for details


Share
Pin203
Tweet
203 Shares

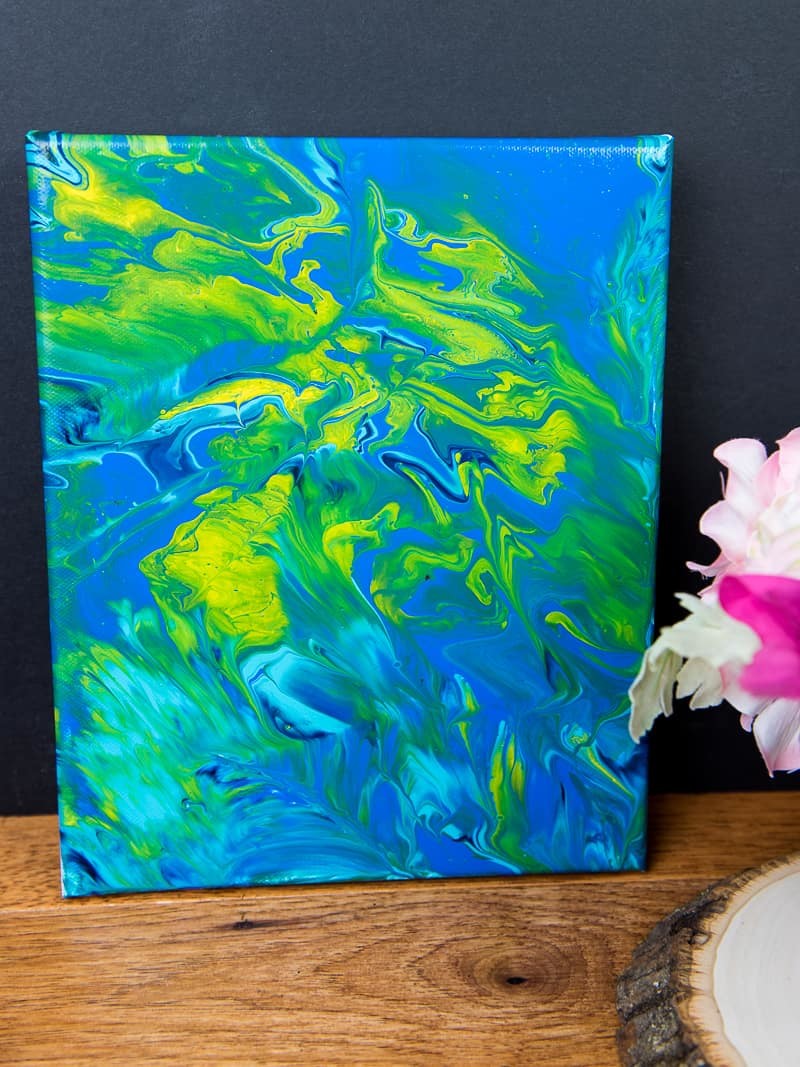
Ever wondered how to make an Acrylic Pour Canvas? It’s so easy! Messy, but super easy and fun.

Acrylic Pour Canvas - This is one messy DIY but it is really fun to make too! You can get creative with color and design and no two art projects will be the same! It's the perfect art piece for your home that YOU made all on your own!

I really wasn’t sure how this was going to turn out. It could’ve gone one of two ways: it would look awesome or it would look like a legit hot mess.

I mean, I mess up about 90% of my projects the first time around so when something comes out right the first time I freak out because I feel like a crafty goddess.

And right now I’m feeling like a crafty goddess/unicorn because this acrylic pour canvas is seriously the coolest thing I’ve made for my office to date.

Harry Potter Acrylic Pour Canvas - This poured canvas is the perfect craft night project to DIY with friends! It's fun, messy, and no two canvases will be alike! You can leave them blank or use vinyl and your Silhouette or Cricut machine to dress them up a bit, like with a fun Harry Potter inspired quote or image...or really anything that you like. This craft project is colorful and easy, all you do is mix paint with water and pour!

Now, I’m not going to lie to you. This craft is super messy. If you’re super OCD and hate mess you may want to skip this one.

BUT! If mess doesn’t scare you then you need to go get the supplies to make this craft asap! It’s really fun and looks so cool once it’s dry.

This acrylic pour canvas is:

  • colorful,
  • fun to diy, and
  • messy!

Acrylic Pour Canvas - This is one messy DIY but it is really fun to make too! You can get creative with color and design and no two art projects will be the same! It's the perfect art piece for your home that YOU made all on your own!

Make your own acrylic pour canvas!

Materials:

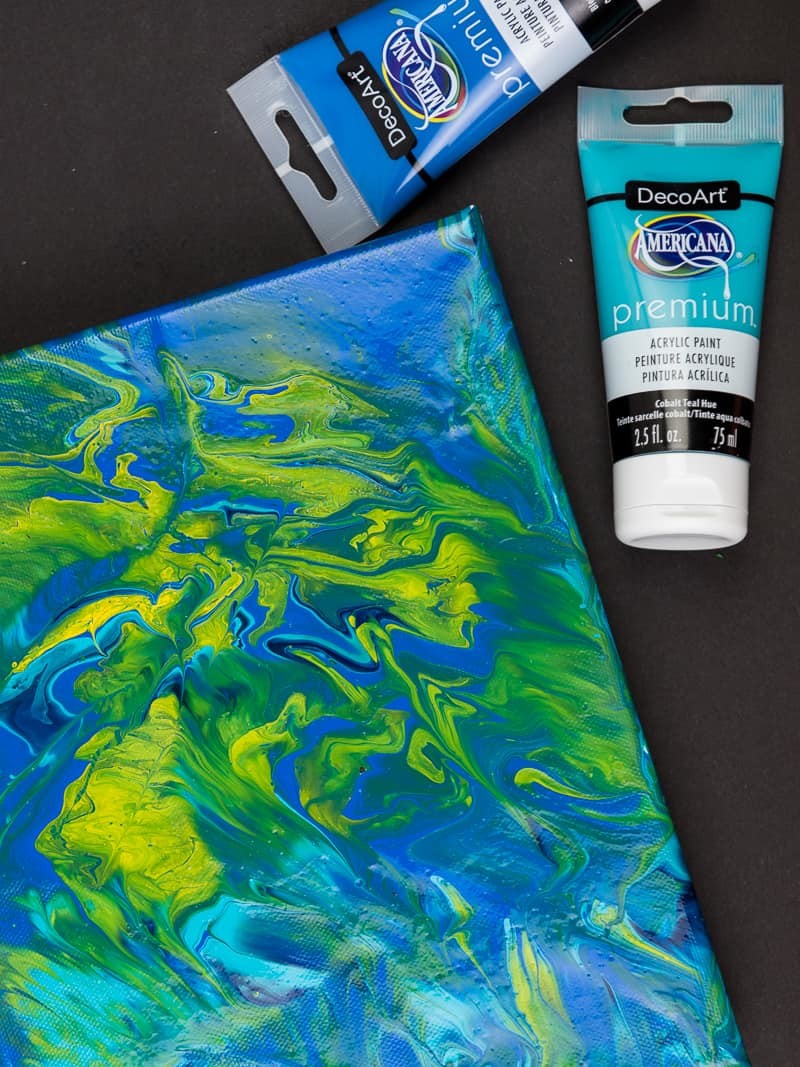
  • Americana Premium Acrylics – Titanium White
  • Americana Premium Acrylics – Phthalo Turquoise
  • Americana Premium Acrylics – Cobalt Teal Hue (this color is super hard to find!)
  • Americana Premium Acrylics – Cerulean Blue
  • Americana Premium Mediums – Extender Medium
  • DecoArt Pouring Medium
  • White canvas
  • Wood craft sticks
  • Plastic cups
  • Push Pins
  • Water

How to pour the acrylic paint (plus what not to do tips!):

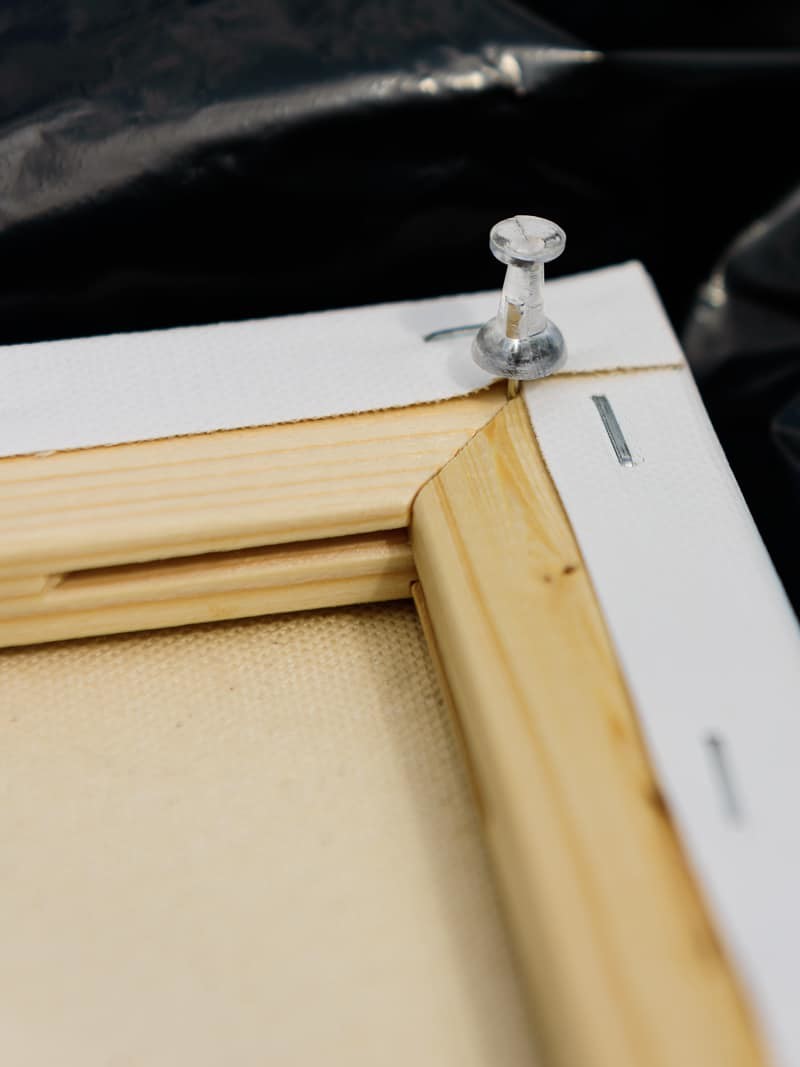
+ Take 4 push pins and put them on the back of your canvas. One in each corner. This helps keep the canvas off the floor so the paint doesn’t pool underneath.

Harry Potter Acrylic Pour Canvas - This poured canvas is the perfect craft night project to DIY with friends! It's fun, messy, and no two canvases will be alike! You can leave them blank or use vinyl and your Silhouette or Cricut machine to dress them up a bit, like with a fun Harry Potter inspired quote or image...or really anything that you like. This craft project is colorful and easy, all you do is mix paint with water and pour!

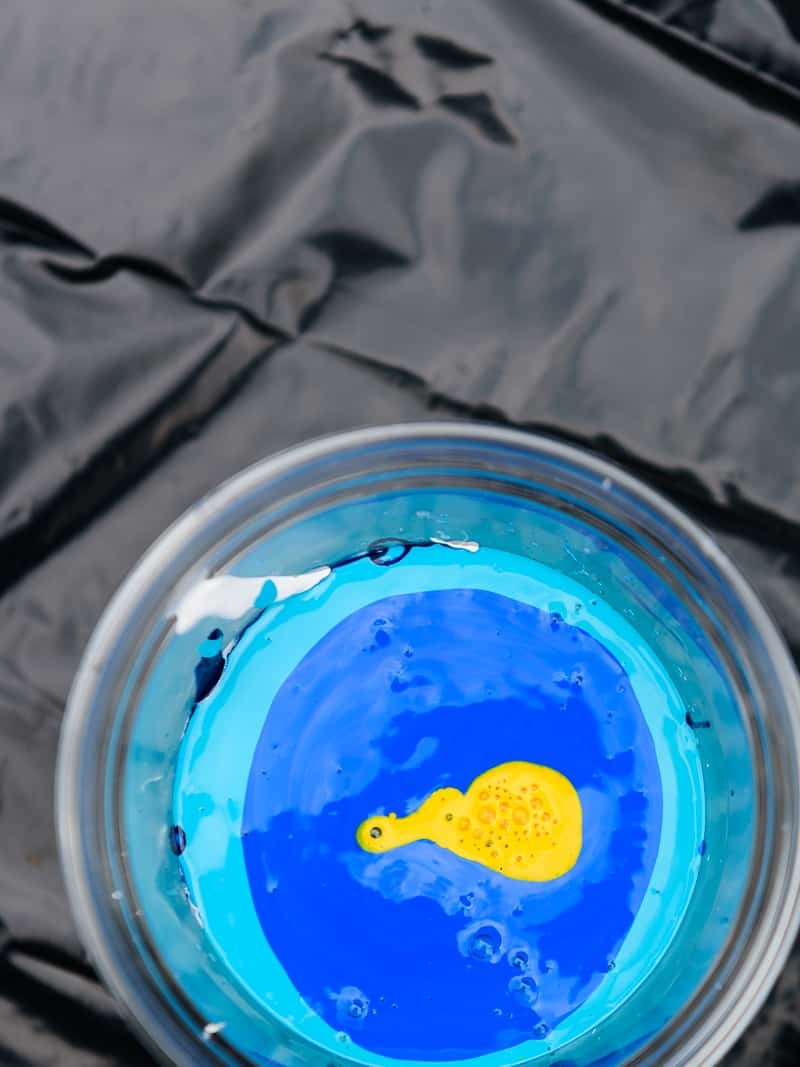
+ Pour each color paint into their own plastic cups. Just don’t use as much white as I did….Maybe cut the white in half.

Harry Potter Acrylic Pour Canvas - This poured canvas is the perfect craft night project to DIY with friends! It's fun, messy, and no two canvases will be alike! You can leave them blank or use vinyl and your Silhouette or Cricut machine to dress them up a bit, like with a fun Harry Potter inspired quote or image...or really anything that you like. This craft project is colorful and easy, all you do is mix paint with water and pour!

+ Mix in a small amount of the pouring medium (or water if you don’t have the pouring medium) in with your paint until it is thinned out to a pouring consistency. Make sure you have no bubbles in your paint before you go to the next step!

+ Take the cup with the Titanium White paint and slowly start layering your other colors on top of it. Once they’re all in take one of your craft sticks and put it in your cup. Move it in a zig zag motion to “mix” the colors a bit before pulling it out. Remember, less is more so don’t zig or zag too many times!

Also, look at that bubbles on the yellow paint. Ughhhh NOOOOOOO. You guys….get those bubbles out! Lesson learned for me.

Harry Potter Acrylic Pour Canvas - This poured canvas is the perfect craft night project to DIY with friends! It's fun, messy, and no two canvases will be alike! You can leave them blank or use vinyl and your Silhouette or Cricut machine to dress them up a bit, like with a fun Harry Potter inspired quote or image...or really anything that you like. This craft project is colorful and easy, all you do is mix paint with water and pour!

+ Prime your canvas with the Extender Medium. DO NOT LET IT DRY!

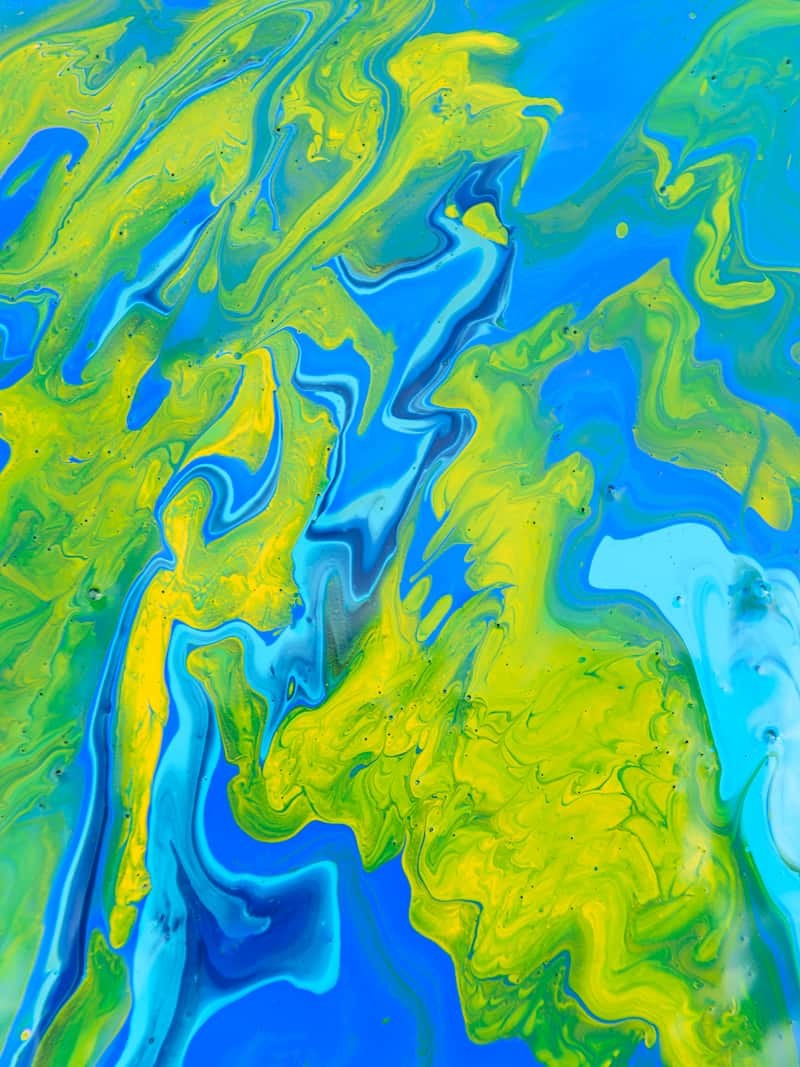
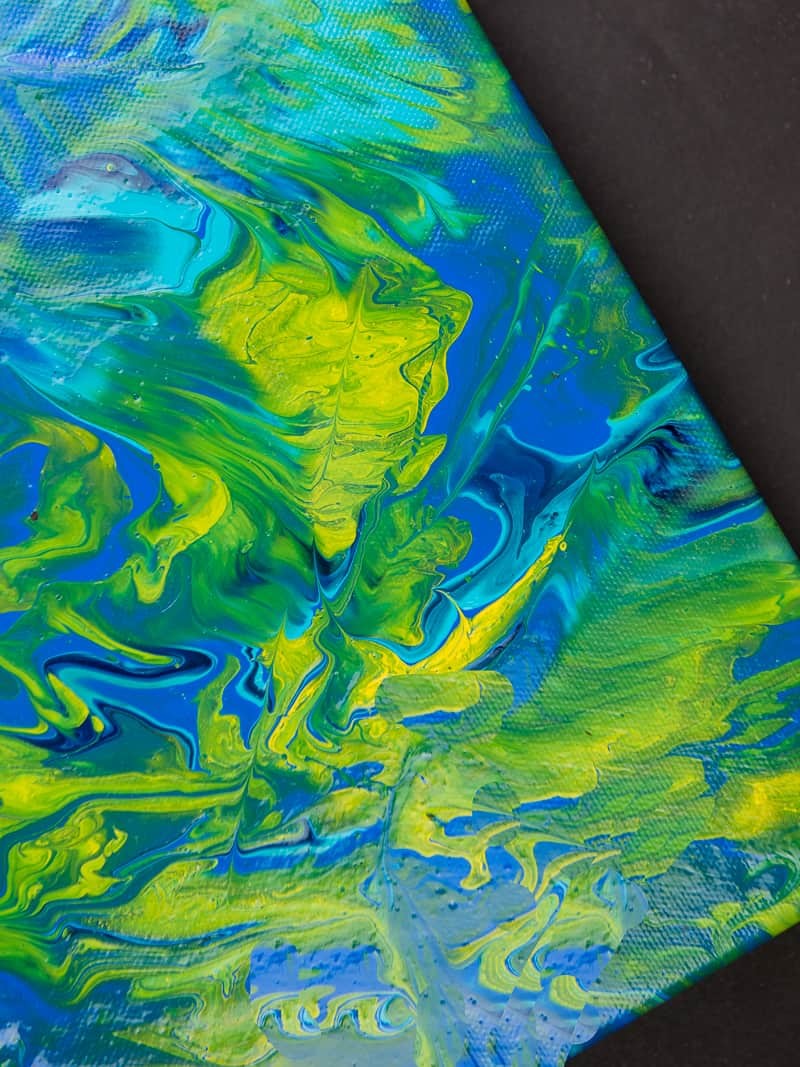
+ Pour your paint onto your canvas while the extender medium is still wet. This will help you manipulate the paint and it’ll spread easier on the canvas.

+ If you have lots of leftover paint (like me!) pull out another canvas and POUR BABY, POUR!

Harry Potter Acrylic Pour Canvas - This poured canvas is the perfect craft night project to DIY with friends! It's fun, messy, and no two canvases will be alike! You can leave them blank or use vinyl and your Silhouette or Cricut machine to dress them up a bit, like with a fun Harry Potter inspired quote or image...or really anything that you like. This craft project is colorful and easy, all you do is mix paint with water and pour!

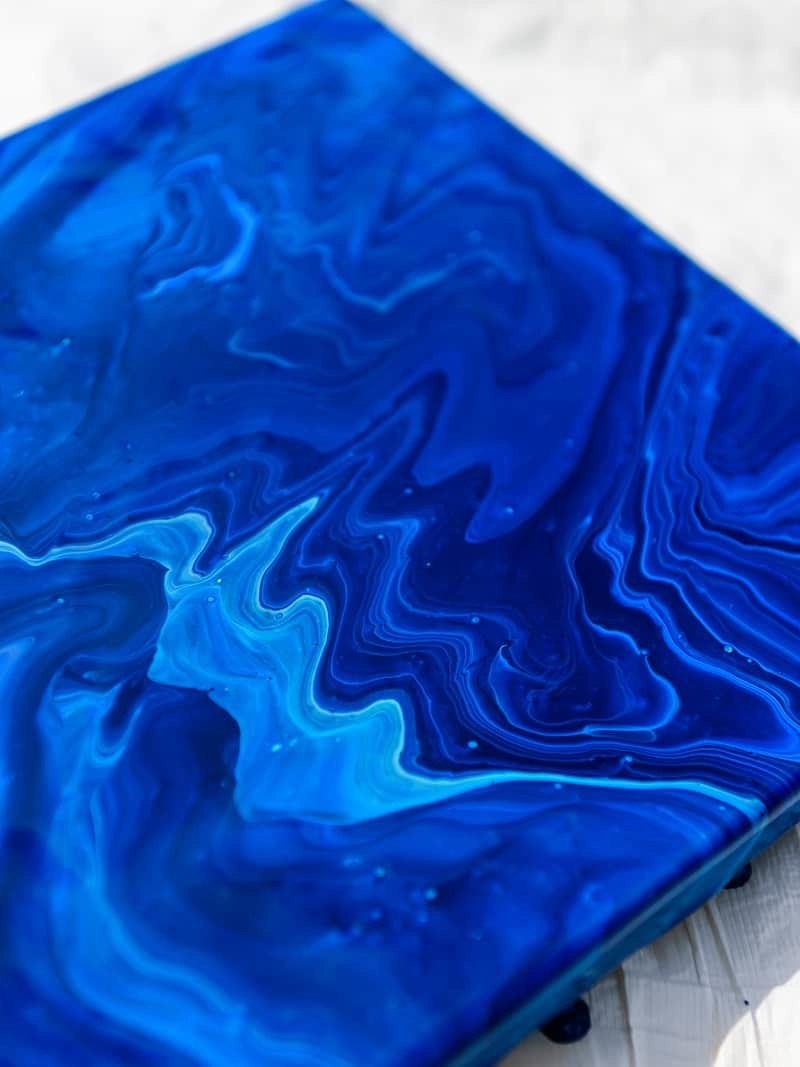
And then you let it dry. For forever.

Okay, maybe not that long but at least do it for 36 hours. If you’re going to put vinyl on it…I’d wait another day or so (check back Wednesday for that tutorial!). You just don’t want that carrier sheet for your vinyl to pull up that pretty design you just poured. It’s better to be extra cautious than not cautious enough.

SOME WHAT-NOT-TO-DO TIPS

  1. You can’t overstir. SERIOUSLY. You cannot overstir. Stir baby, stir until all those bubbles are gone!
  2. Do not do this outside. Unless you like the look of dead bugs hanging out in wet paint. Picking them out isn’t fun AND it can mess up spots on your canvas. NOPE. Next time I’ll do it inside.
  3. Do not pick up these canvases while they’re still wet. (this is another reason to do them inside) I picked up the all blue one and completely wiped the paint off the sides of the canvas. Bummed can’t even begin to cover how I felt. I fixed it…but if you can leave the canvas in one place until it’s dry you won’t have to worry about this. Don’t be like me. Work smarter, not harder.

And that’s it! You’re done!

Hoenstly, the longest part about this acrylic pour canvas is setting everything up and letting it dry. I might’ve not thinned my paint out enough which is why it took so long to dry.

I don’t know, I’ll have to try it again with thinner paint and see.

But the best part is that you can pretty much use any color you want and create a really cool custom piece for your house. I’m already dreaming of one for our dinning room, though that one will have to be huge and I don’t know how I’ll pour it inside!

Check out more of my quick and easy paint projects!

  • Gradient Wooden Easter Egg Sign
  • Fresh Cut Christmas Tree Truck Sign
  • Reversible Merry and Bright Christmas Sign

Acrylic Pour Canvas - This is one messy DIY but it is really fun to make too! You can get creative with color and design and no two art projects will be the same! It's the perfect art piece for your home that YOU made all on your own!

more colorful crafts!

How to Use Heat Transfer Vinyl on Shirts

How to Use Heat Transfer Vinyl on Shirts

How to get clean lines with Stencil Vinyl

How to Get Clean Paint Lines When Using a Stencil

How to use transfer tape for your Silhouette and Cricut projects

How to Use Transfer Tape

How to successfully weed small designs with your Silhouette Machine

How to Successfully Cut and Weed Small Designs with Your Silhouette

Avengers Winter Gloves Stocking Stuffer Idea

DIY Quick and Cheap Avengers Winter Gloves Stocking Stuffer

Hand Lettered Matching Family Christmas Shirts DIY

DIY Matching Family Christmas Shirts

Reversible Hand Lettered Christmas Sign

Thanksgiving to Christmas Reversible Holiday Wood Sign

Halloween trick or treat bag - If you've got 10 minutes you can make this Mickey themed halloween tote bag! It's so easy to make with your Silhouette Cameo and the color options are limitless! #silhouettecameo #handmadehalloween #disneycrafts

Treat Yo Self Halloween Trick or Treat Bag

Share
Pin203
Tweet
203 Shares

Filed Under: Crafts & DIY Tagged With: acrylic paint, decoart Leave a Comment

About Teresa

A quick thing about me: I ♡ MY SILHOUETTE MACHINE. I also have a sweet passion for photography, pretty much any kind. I'm a little obsessed with Disney + Harry Potter and love to make nerdy things for our home and our son.

Did you make one of our projects? Tag @simplymadefun on Instagram so I can CHECK IT OUT!

Simply Made Fun is a participant in the Amazon Services LLC Associates Program, an affiliate advertising program designed to provide a means for sites to earn advertising fees by advertising and linking to Amazon.com.

Reader Interactions

Leave a Reply Cancel reply

Your email address will not be published. Required fields are marked *

Primary Sidebar

Hey friend!
I’m Teresa: silhouette addict and vinyl hoarder. I’m here to show you how to master your machine and craft a life you love. Learn more →

Looking for Something?

Follow Along

  • Facebook
  • Instagram
  • Pinterest
  • Twitter

Footer

Disclaimer: Simply Made Fun is a for-profit blog. All companies and organizations that I work with are chosen by me. I will never post anything that is not an honest opinion of mine, regardless of compensation. There may be affiliate links present within posts that offer a compensation to me upon purchase. These will always be disclosed.

Copyright: All images and content are copyrighted by Teresa Cox and Simply Made Fun, unless otherwise stated. Images may not be cropped or altered under any circumstances without written consent. If you quote any content from this blog, please be sure to link back and give proper credit. Thank you!

Copyright © 2017 • Back to Top • Contact • Privacy Policy

Simply Made Fun is a participant in the Amazon Services LLC Associates Program, an affiliate advertising program designed to provide a means for sites to earn advertising
We use cookies on this website. READ OUR COOKIE POLICY HERE.